Are you tired of dealing with excessive glare or looking for a way to add privacy to your home? Applying window film supplier could be the perfect solution to these common household problems. Learning how to apply window film like a pro allows you to transform any glass surface in your home into a functional, aesthetic addition. Whether you are seeking to enhance your home’s energy efficiency or simply adding a decorative touch, window film can offer a myriad of advantages when installed correctly.
Before you begin, it’s vital to choose the right type of window film for your needs. There are various types available such as solar control film, decorative film, and safety film, each serving a unique purpose. Solar control films can help reduce glare and UV exposure, while safety films provide added protection against shattering. Decorative films, on the other hand, can serve as an attractive feature for your glass surfaces, adding character and style to your living space.
Once you’ve selected the perfect film, gather the materials you’ll need for installation: a spray bottle filled with soapy water, a utility knife, a squeegee, a ruler or measuring tape, and a microfiber cloth. Having these tools at hand ensures a smooth and hassle-free installation process.
Start by cleaning the window thoroughly. Any dirt, dust, or grease left on the surface can cause the film to bubble and not adhere properly. Use a glass cleaner and a microfiber cloth to ensure the window is spotless. A streak-free surface provides the best base for the film to stick.
Next, measure the window and cut the film. Cut it slightly larger than the window itself to allow for adjustments and trimming. A precise cut will make the application process more manageable and help you avoid having gaps at the edges.
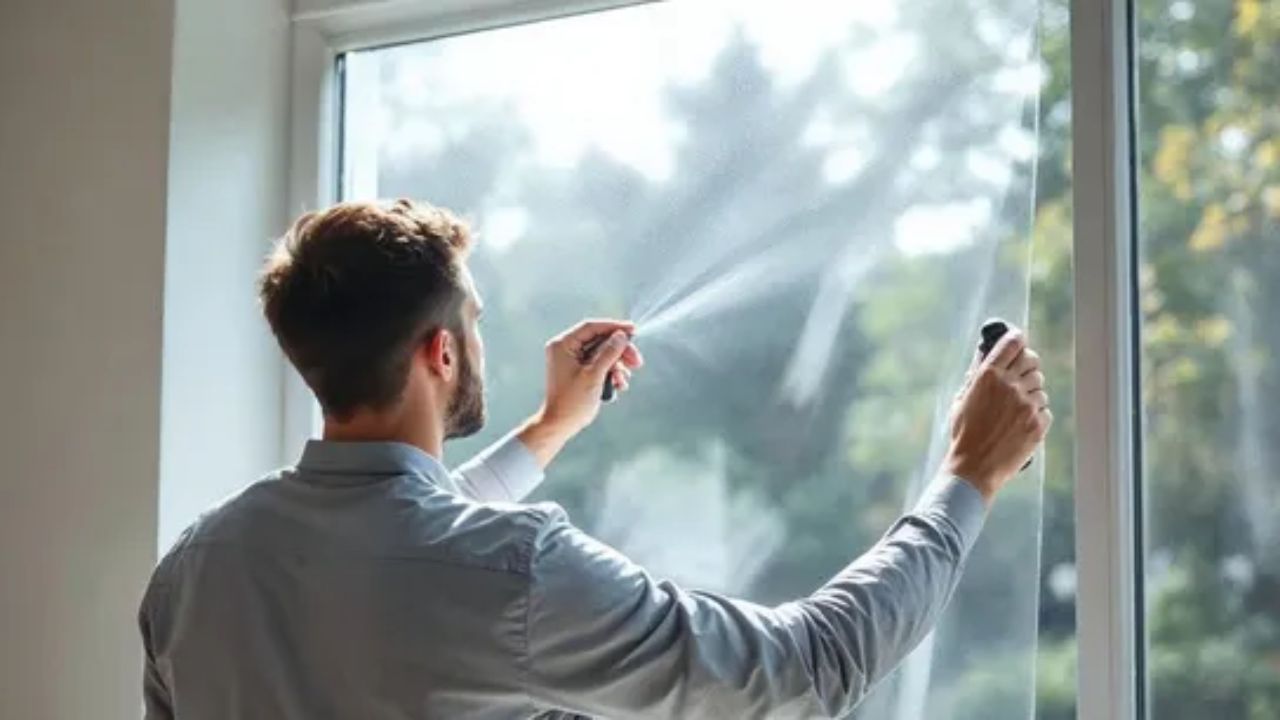
With your spray bottle, generously mist the window with the soapy water solution. This step is crucial as it allows the film to be positioned correctly and prevents it from sticking to the glass immediately. To make the soapy solution, mix a few drops of liquid dish soap with water.
Carefully peel the backing from the window film, exposing the adhesive side. Be cautious during this step, as the adhesive can attract dirt or lint. Align the film starting at one corner of the window. Use your fingers to lightly press the film into place, adjusting as needed to ensure an even application.
Once aligned, use the squeegee to remove excess water and air bubbles. Start from the centre and push outwards towards the edges. This will help secure the film firmly to the glass and eliminate any trapped air or water that could cause imperfections.
Trim the excess film using your utility knife, cutting along the edge of the window for a clean finish. Take care to cut carefully to avoid scratching the glass.
Finally, inspect the installation. Look for any remaining bubbles or imperfections and address them with your squeegee. Allow the film to cure, which can take up to a week depending on the film type and conditions.
Applying window film is a practical skill that every homeowner can learn. With the proper tools, a bit of patience, and attention to detail, you can achieve a professional finish while enjoying the functional benefits of window film. Transform your home’s glass surfaces with confidence and enjoy the rewards for years to come.